“What hunger is in relation to food, zest is in relation to life.”
– Bertrand Russell, Logician and Philosopher
Your only critical decision this morning is whether you’re going to go with flavedo and albedo, or exocarp and mesocarp. We’re going to completely ignore the endocarp and vesicles. Really, it’s that simple. I’ll wait.
Okay, now that you’ve made your decision… you didn’t? I had such faith…. Maybe you just need some encouragement. You see, over dinners this weekend, which we’ll get to in the next post, one of the favorite bits was the garnish for the dessert, candied lemon peel. It was intriguing enough that one night someone asked if we had more just to have on the table and nibble at while they had their coffee (we did), and four people have already asked me for the how to. So, we’ll delve right into another step by step.
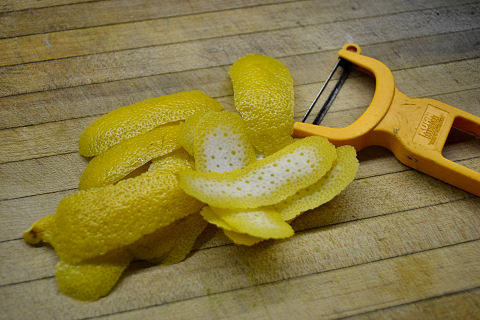
So, here’s the flavedo and albedo, together, though not quite in their natural state, which would be wrapped around a lemon, and referred to as its rind, or peel. The yellow part is the exocarp, though that would be true of any fruit’s outer skin, flavedo is specific to citrus fruits. The white pith as we usually call it is the mesocarp, or in citrus fruits, the albedo. In the category of citruses, the skin that surrounds the individual segments is the endocarp, and the juicy little pockets inside each segment that are more or less like large cells, are the vesicles. Got all that?
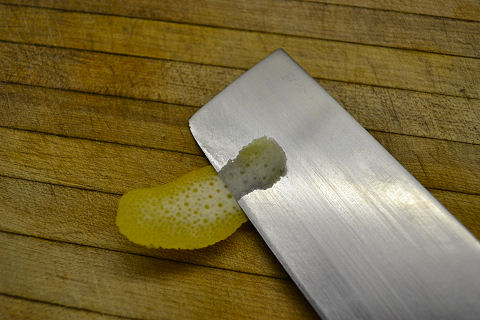
Next step, having peeled off those large swathes from the lemon, is to remove the pith – it’s bitter, not pretty, and doesn’t add anything to the zest – the has-been Hollywood diva of the citrus world. Using whatever knife you’re comfortable with, from a paring knife on up, you cut in very slightly at an angle to get under the pith, and then lay it flat and carefully move it back and forth in a sawing motion to remove the white part. Take it slow, it’s easy to slip and cut your fingers if you don’t, and unlike when chopping, here the blade is facing directly at them.
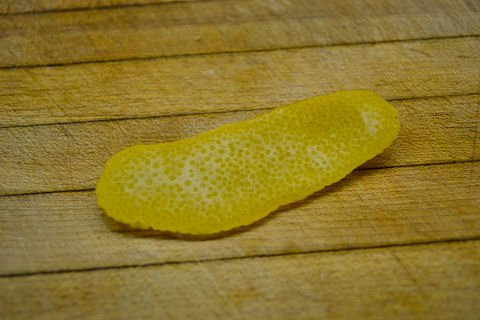
When the pith is removed, we’re left with, basically, pure flavedo (I just like the sound of that, don’t you?).
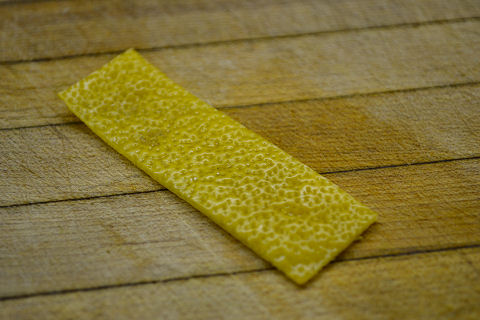
This is a purely aesthetic move, and one I don’t usually do, but just wanted to demo it as a tangent for anyone who wants to – you can square off the edges to make perfectly even sized strips of zest. There might be times you’d want to do that, depending on how you’re going to use it.
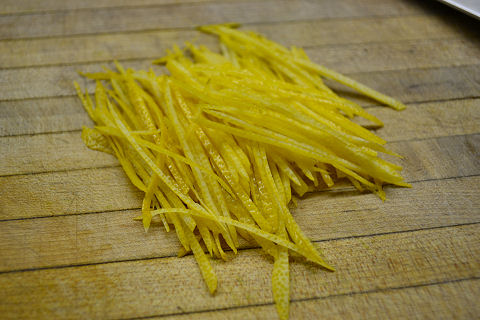
Cut the strips into a thin julienne – relatively even in terms of width, again, much of that is aesthetic, and the decision of how wide and how long comes down to what you want the finished product to look like. You could just as easily cut little squares or triangles or punch out little circles with a cutter of some sort.
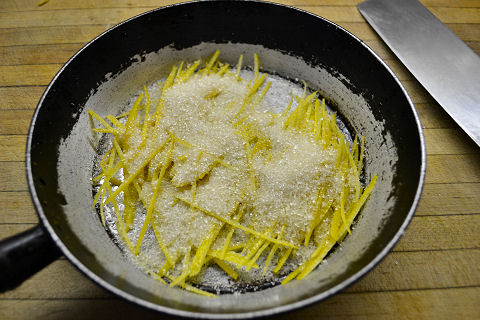
Into a pan that’s basically wide enough that the zest just covers it – this is two lemons worth of zest. Toss in sugar to coat – roughly a tablespoon per lemon – either white sugar or unbleached organic sugar is fine here – not brown sugar (which will work, but changes the flavor significantly).
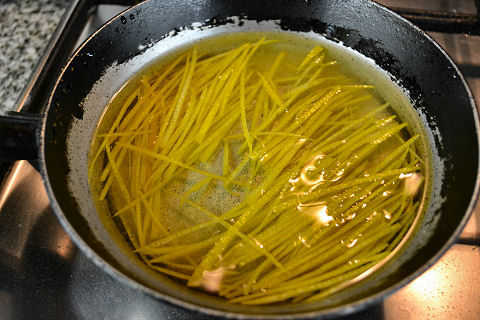
Add water to a depth of about 3/4″. Some people like to blanch the lemon zest in water once or twice first to soften it, and then cook it in just plain sugar, but I learned it this way – first off, if you blanch it separately, then you’re throwing away some of the aromatic quality with the water you pour off rather than cooking the peel in the water flavored with it, and second, you have to be really careful that the sugar doesn’t caramelize too quickly. This works, trust me.
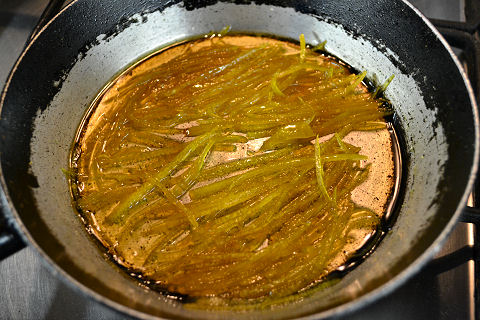
Over the lowest flame you’ve got, just let this cook, checking on it now and again – it’ll take about 45 minutes to an hour to slowly simmer off the water, tenderizing the peel, infusing it with the sugar, and bringing the liquid down to a thick syrup, more or less the consistency of honey. I don’t like to cook it until the liquid is completely gone as then the sugar starts to caramelize and/or burn, which changes the final taste, plus, the syrup helps keep the zest supple.
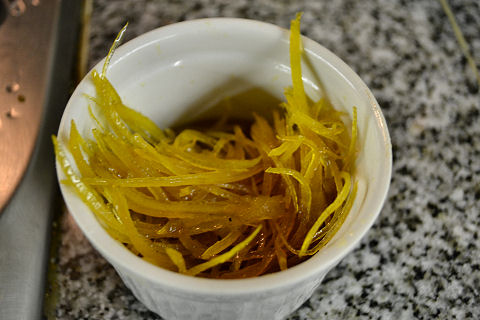
And, remove from heat, put in a bowl, and let cool. You can also spread it out on a rack and let the syrup drip off, but it’s not necessary, and I like to keep it in the syrup so it doesn’t dry out. Cover with plastic, keep at room temperature, it’s good for 3-4 days. You could take it one step further, generally with wider strips, of drying them (after draining off the syrup) spread out on a sheet of wax paper in a low heat oven, and midway through the process coating them with more sugar, or powdered sugar to get that more crystallized lemon peel. What can I say, I like the glowing translucent quality, and moisture of this style, so this is where I generally stop.
[…] And finally, back to our February menu and the Lemon curd served with a 1988 Pol Roger Brut champagne – Henri Matisse, known for his use of color in paintings of simple, daily life; “Who will have some lemonade? You know our rules: total abstinence.” “No use, dear. They’ve all had champagne.” – Bernard Shaw, Candida; Turkey declares war on Greece (I’m guessing I used that as an inspiration for the “curd”). I returned here to our chocolate-lemon tart, a perennial favorite, but decided to emphasize the yellow in layers, a monochromatic presentation perhaps, but one that works I think. From the bottom up, an almond flour crust, the lemon “curd” filling, white chocolate ganache, and, the garnish, which we covered yesterday, candied lemon peel. […]